Table of Contents
Sometimes flags explicitly mention the need for a split, but sometimes the need to split a taxon arises after a swap or a move that results in unintended disagreements as described above.
Think about splits as a way to keep existing identifications in sync with the taxonomy when a portion of a species is carved off as a new species. For example, imagine Species A occurs on both sides of a river with many identifications on each side. If the taxonomy changed such that everything east of the river was now Species B, and Species A only occurred west of the river, existing identifications of Species A that were east of the river might then be out of sync with this new taxonomy. IDs can be brought back in sync by splitting Species A into Species A and Species B. Committing a split like this without first creating atlases for all the species involved would roll back all existing IDs of Species A to the common ancestor of the two species. If Species A and B are spatially disjunct, as in this example, adding atlases will tell iNaturalist whether to replace existing IDs of Species A with IDs of Species B, to leave them at Species A, or to bump them up to the common ancestor.

- Step 1: Set up the split
- Step 2: Analyze IDs and consider atlases
- Step 3: Remove or alter the taxon range
- Step 5: Check for deviations and active children
- Step 6: Committing the split
- Step 7: Resolving the flag and encourage the community to ID coarsened observations
- Tip 1: Large splits may take a while to process
Step 1: Set up the split
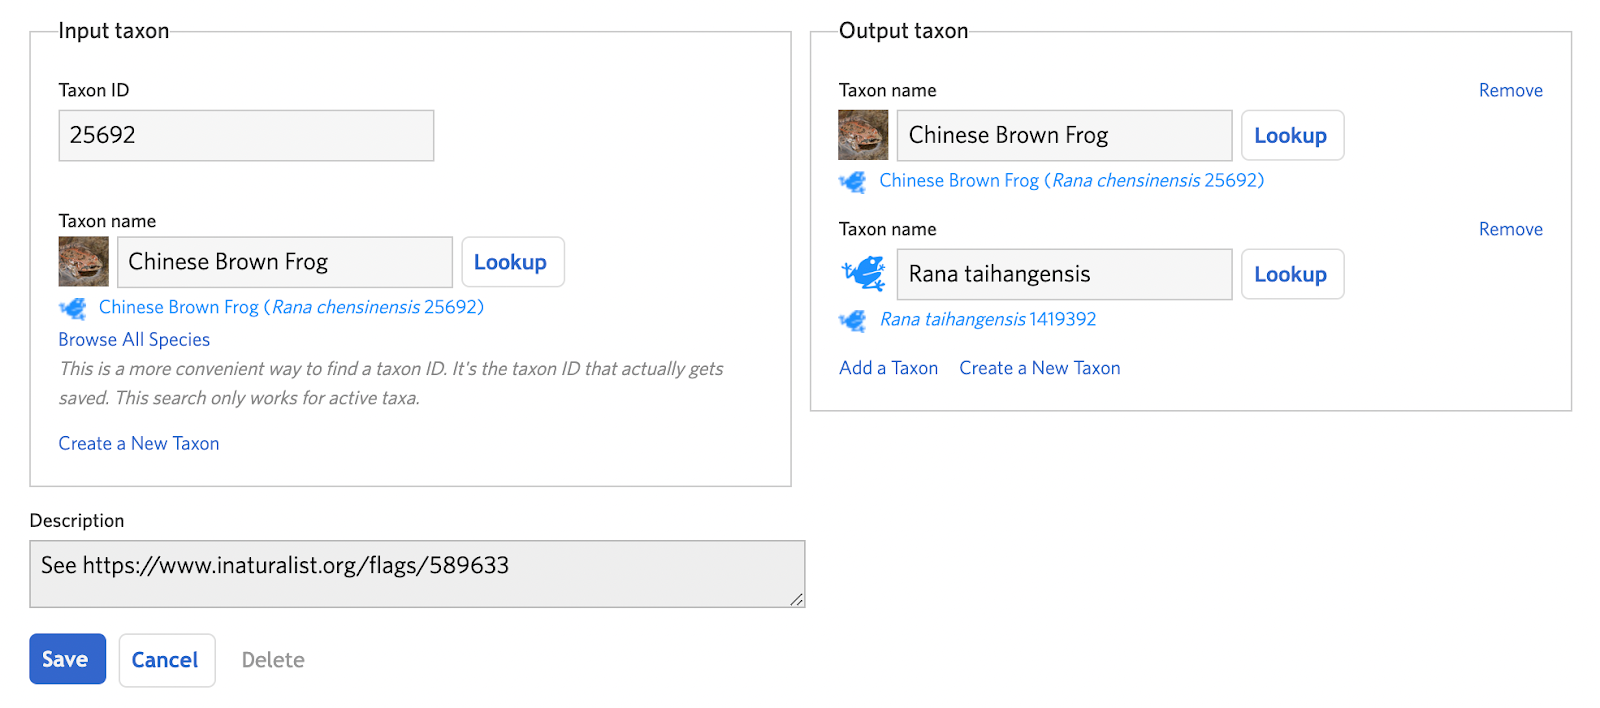
Create a new taxon change of type “Split” and add the input taxon (the taxon that will be split) and the output taxa (the taxa that will result from the split). In cases where the name of the input taxon needs to remain even if its definition has become more constrained, the input taxon can actually be one of the output taxa. This helps reduce the need for adding new IDs. If the other output taxon doesn’t exist, click the “Create a New Taxon” link in the output taxon box (see A. Step 4). Click "Save" to complete the draft.
Step 2: Analyze IDs and consider atlases
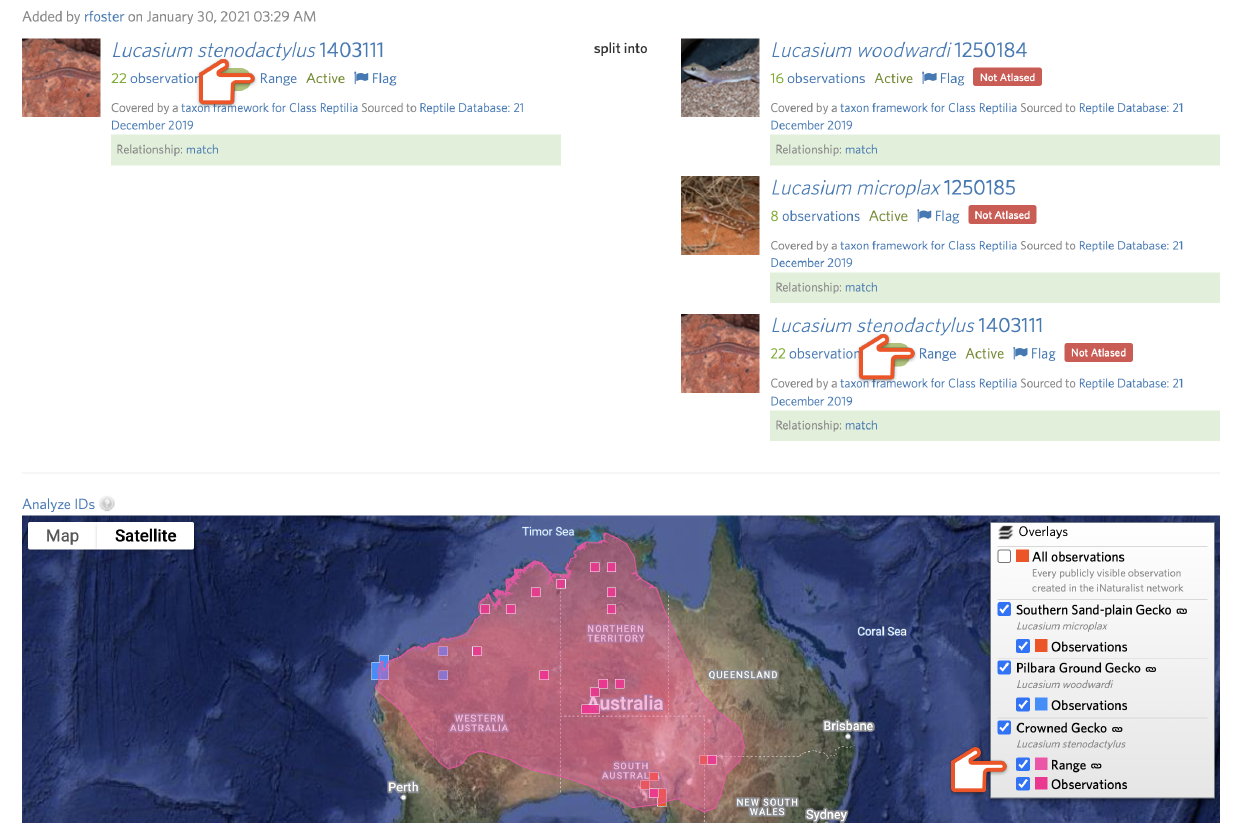
You can use the Analyze IDs tool to explore what will happen to the existing identifications on the input taxon when the draft split is committed. If not all the output taxa have active atlases, all IDs will be counted as “Outside of all atlases” and will be replaced by the nearest common ancestor of all of the output taxa. If the atlases of the output taxa have a large degree of geographic overlap, atlases might not be helpful.

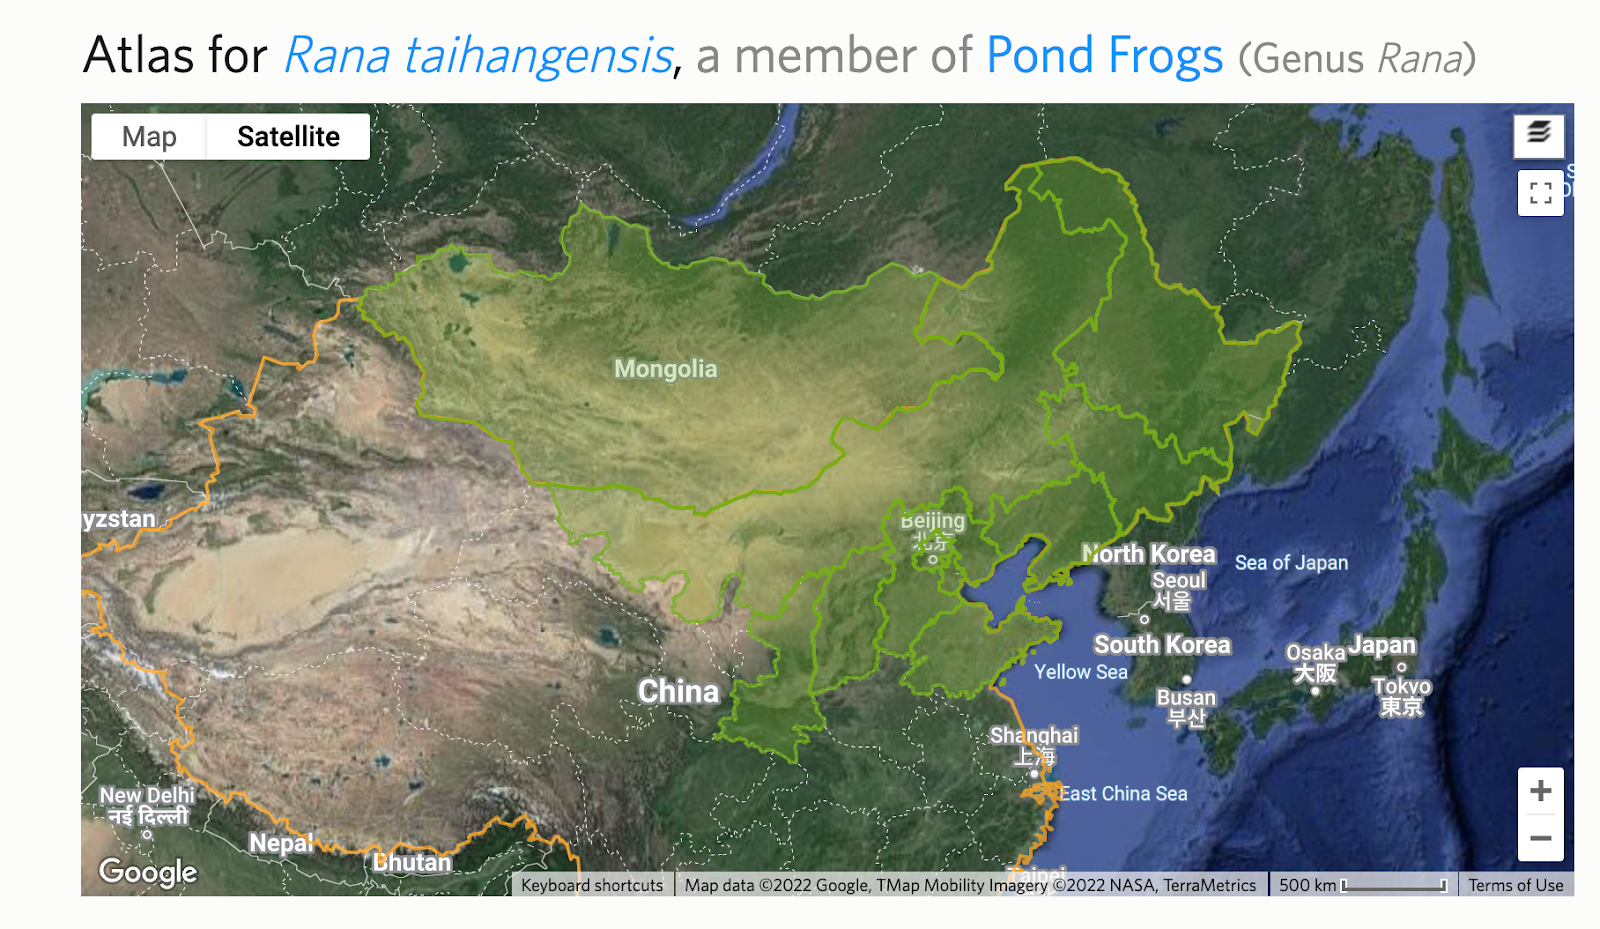
An output taxon will display the green "Atlased" badge if an active atlas exists. Otherwise a red "Not Atlased" badge will appear. Click the badge to access the atlas page or create a new one. Alter the atlas for the input taxon to reflect its smaller range by removing atlas places.

Then create new atlases for the other output taxa that reflect their ranges by adding atlas places.
After rerunning Analyze IDs, you can often significantly improve the fraction of existing IDs of the input taxon that will be replaced with one of the output taxa rather than a common ancestor.

Splits can be destructive, so before committing them it’s generally a good idea to ask others about anything you may be unsure about, such as the structure of the split or the atlases of the output taxa.
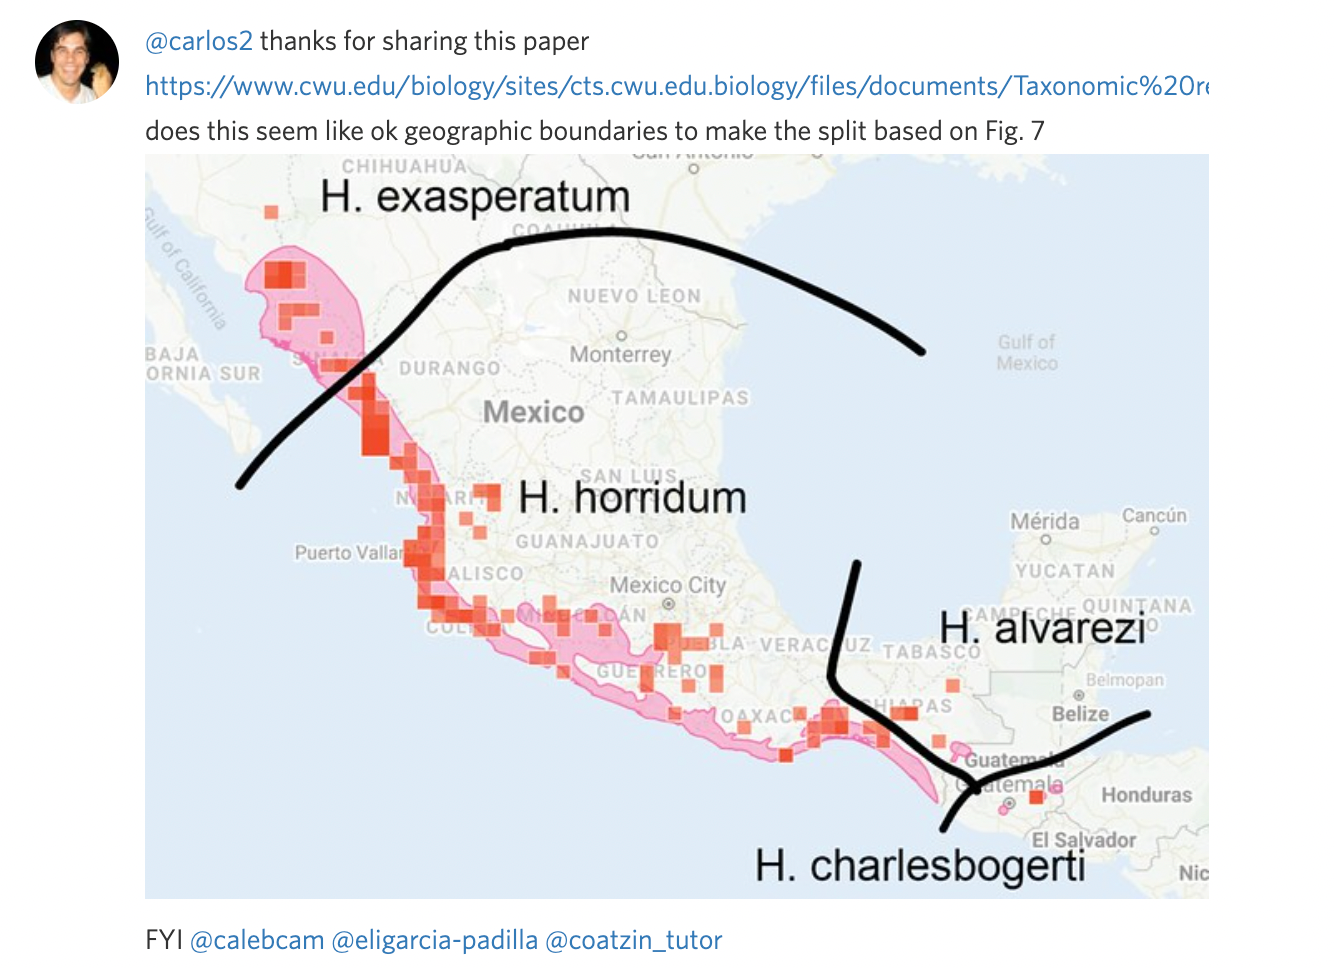
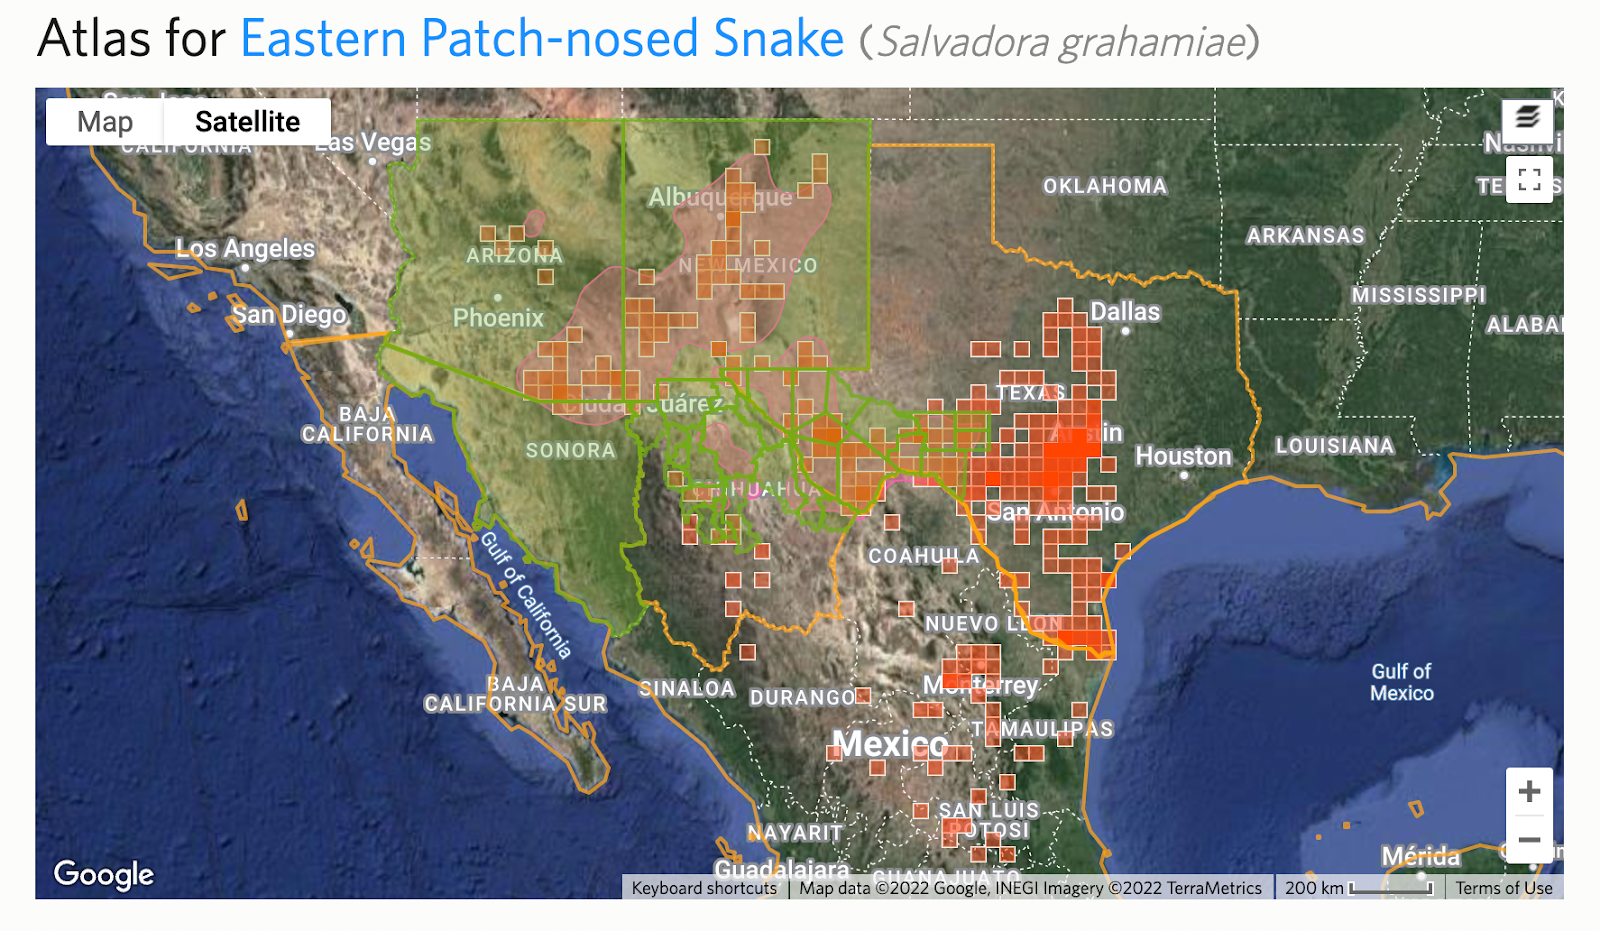
Often it's easier to communicate a split visually than with words. Unless you can link to a specific map figure in a paper that clearly describes the ranges of the output taxa, we encourage you to take a screenshot, manually annotate it, and include this as a comment in the flag to get feedback and make sure the draft split and atlases are set up to achieve the desired results.
Step 3: Remove or alter the taxon range
If the input taxon has a Taxon Range, it may no longer be suitable after the split is committed. If this is the case, you must remove or alter it. If the input taxon does not have a taxon range, proceed to Step 4.
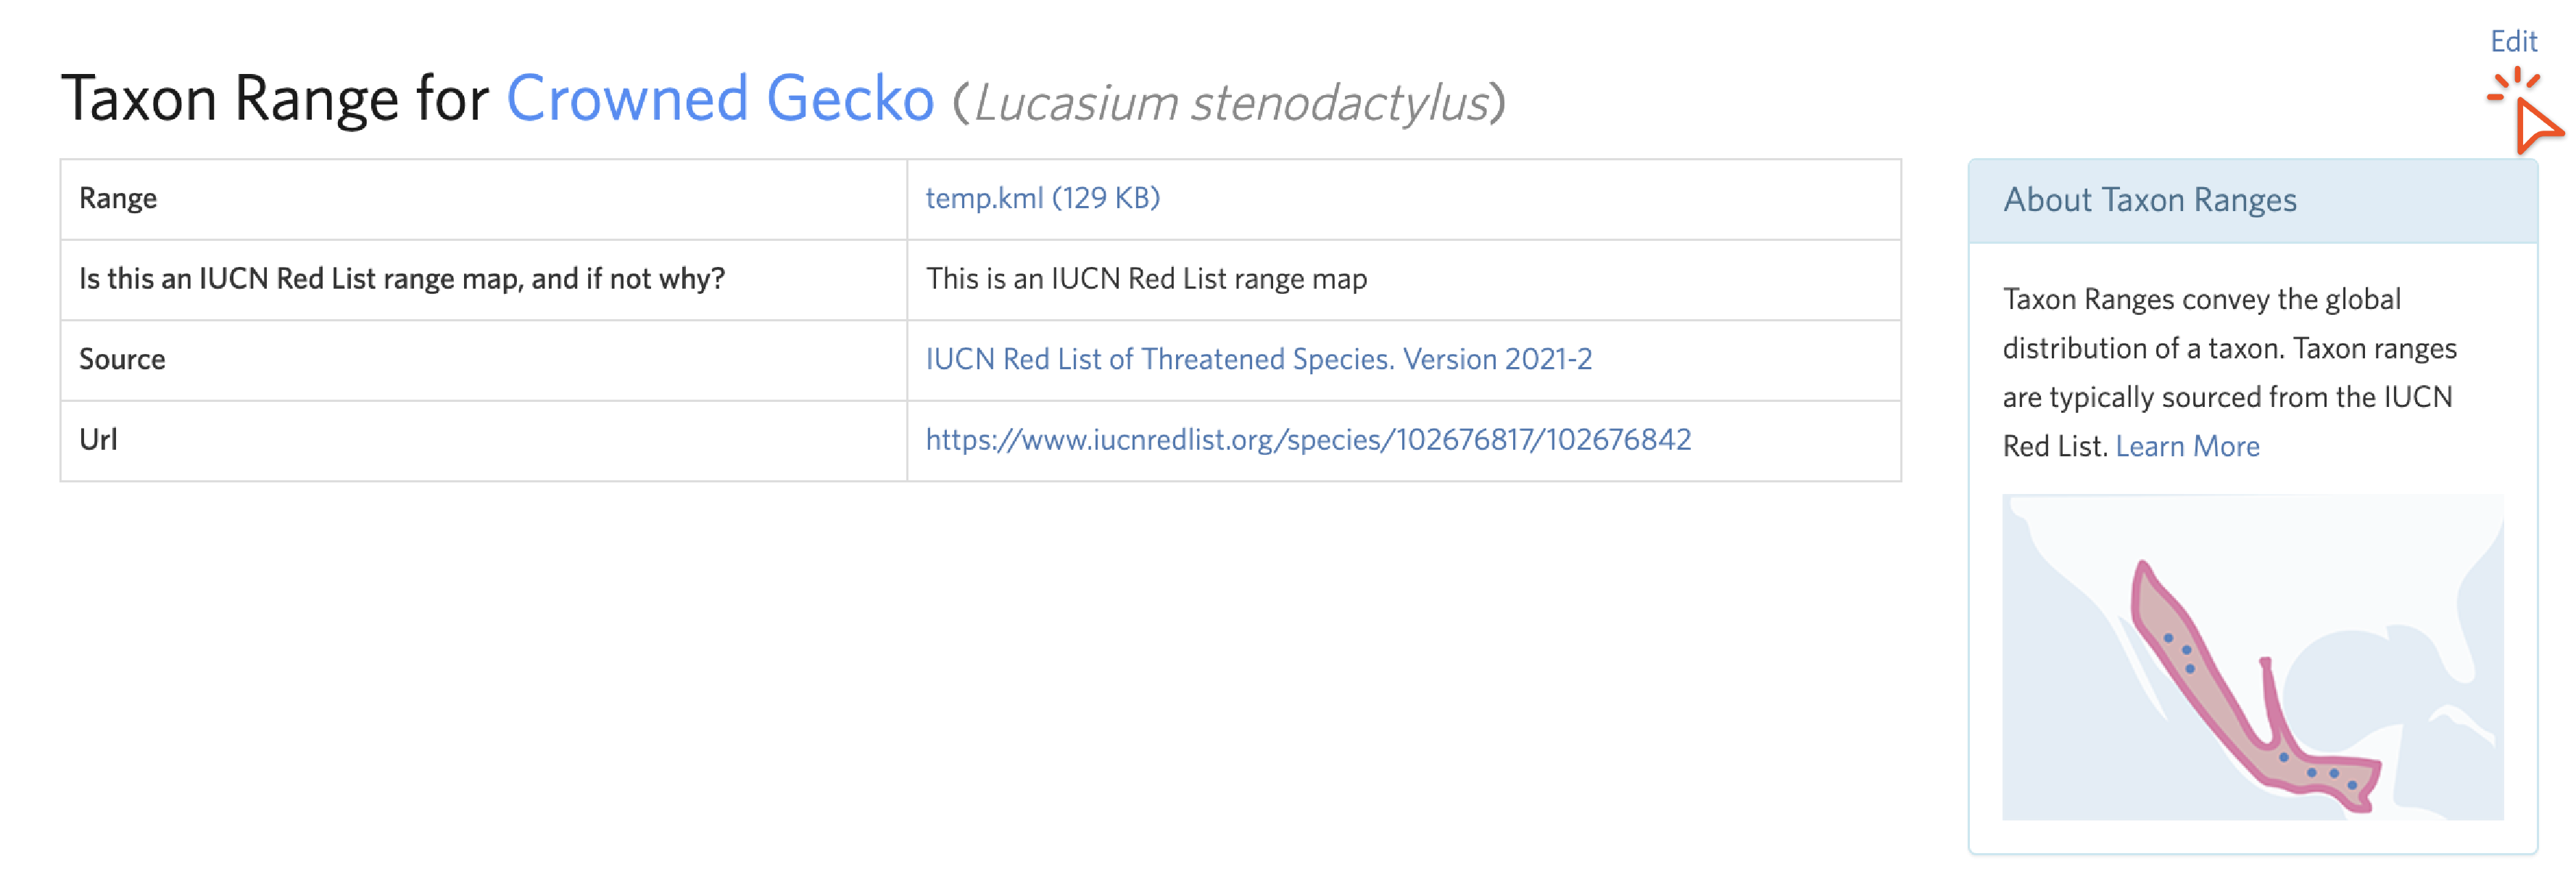
Taxon Ranges are the colored polygons that display on some species maps. These generally come from the IUCN. If a taxon range does not match what we mean by a species due to taxon splits or other taxonomic mismatches, they should be removed or altered. However, all range maps are imperfect abstractions and it is not worth replacing an IUCN range for small errors in the distribution (“range should extend east to border”) unrelated to taxonomic mismatches. Use your discretion to decide if a range is sufficiently misleading to warrant removal.
To access a taxon range page, click on the link icon next to “Range” in the Overlay menu on a map. To remove or replace a taxon range, click “Edit” in the upper right corner.
Step 3a: Remove a taxon range
We encourage you to alter an unsuitable taxon range, but if you don't have the skills or time to do this, remove it instead. To do this from the Edit Taxon Range screen, check "Delete range," toggle to the "unsuitable" choice, remove any source, url, or source identifier information, explain in the description why the IUCN range is unsuitable, and click "Update".

Step 3b: Altering a taxon range
If you want to replace the range with an alternative that you create, we recommend using QGIS, a free desktop Geographic Information System. As a starting place, download the input taxon's range you want to alter in KML format by clicking the link in the “Range” cell from the taxon range page.

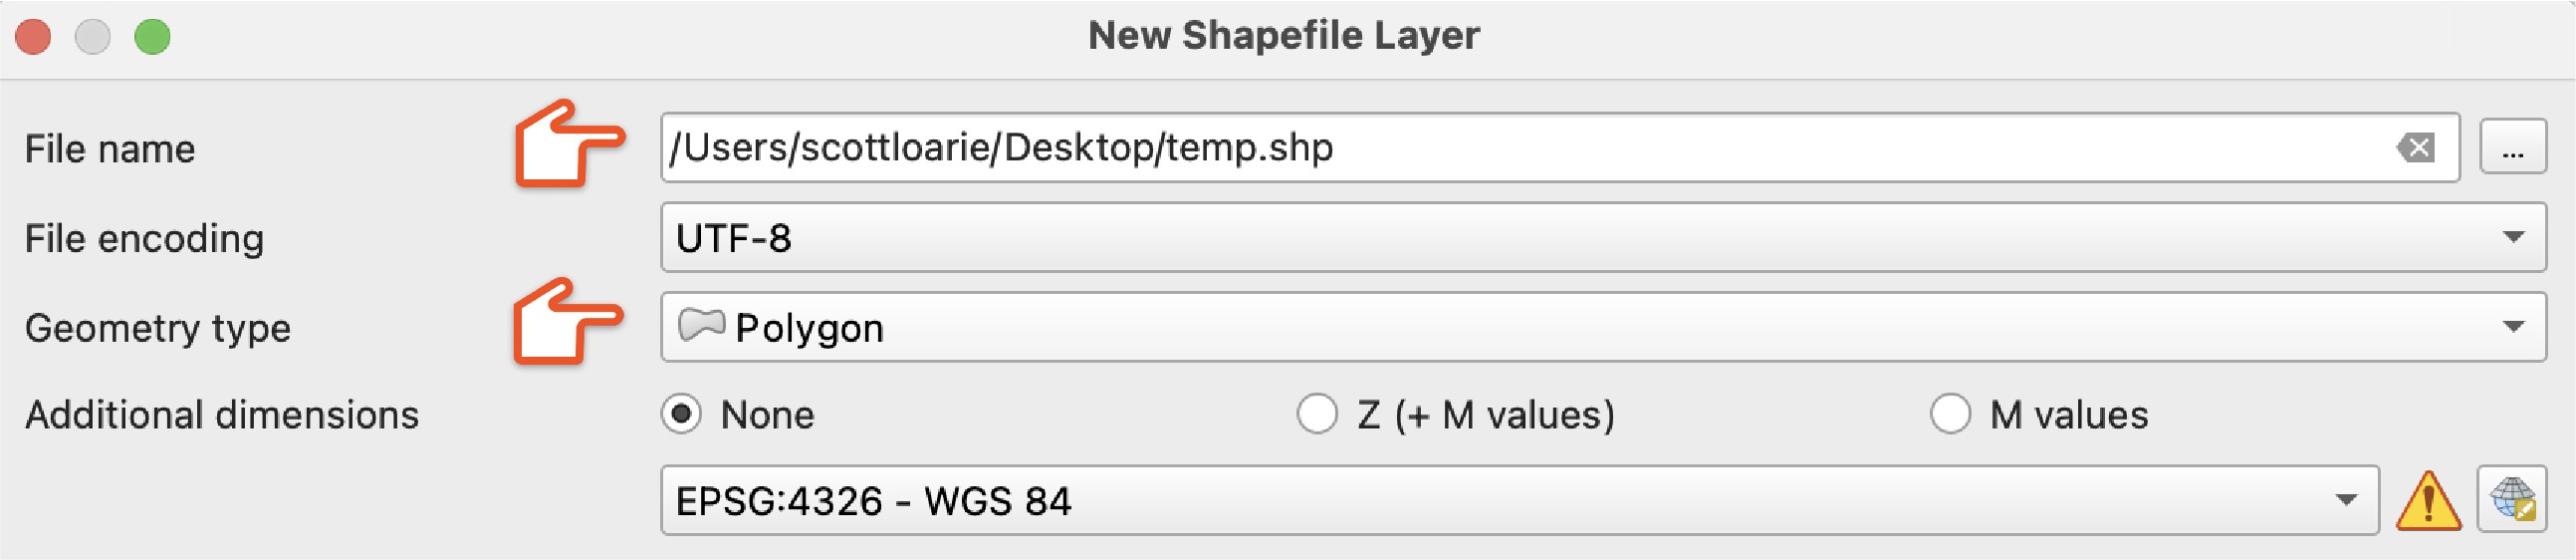
In QGIS, create a "New Shapefile Layer" to start carving off a piece of the input taxon representing one of the outputs.

Choose a "File name" and set "Geometry type" to "Polygon."
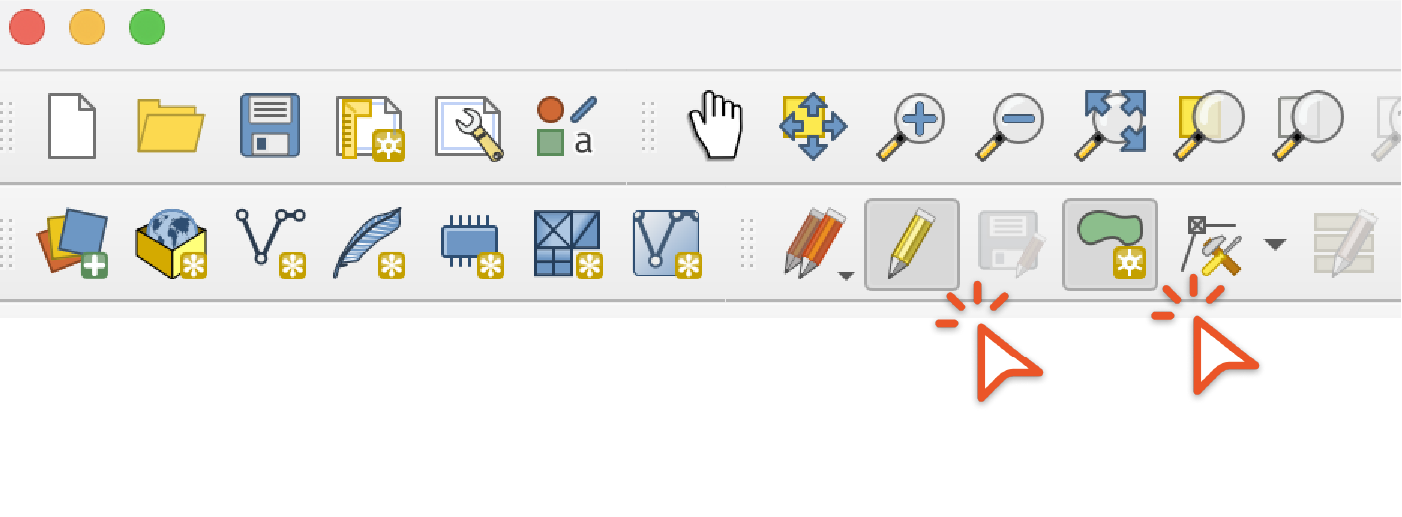
Click the "Toggle Editing" then the "Add Polygon Feature" buttons and draw a polygon use to split the range
Then use the "Difference and "Intersection" options under the "Vector" / "Geoprocessing Tools" menu to create ranges for each of the output taxa. If you get an error saying that the feature has invalid geometry, use the "Buffer" tool with a buffer distance of 0 on the range which will usually repair the geometry. Then use the output of the "Buffer" tool as the input in the "Difference" and "Intersection" tools.

Select “Save Features As” under “Export” to export the output ranges in KML format.

To update a taxon range with the new KML, edit the taxon range and click “replace” to select the new KML, toggle to the “unsuitable” choice, remove any source, url, or source identifier information linked to IUCN, and explain where the replacement range came from. In this case it was derived from the IUCN range.

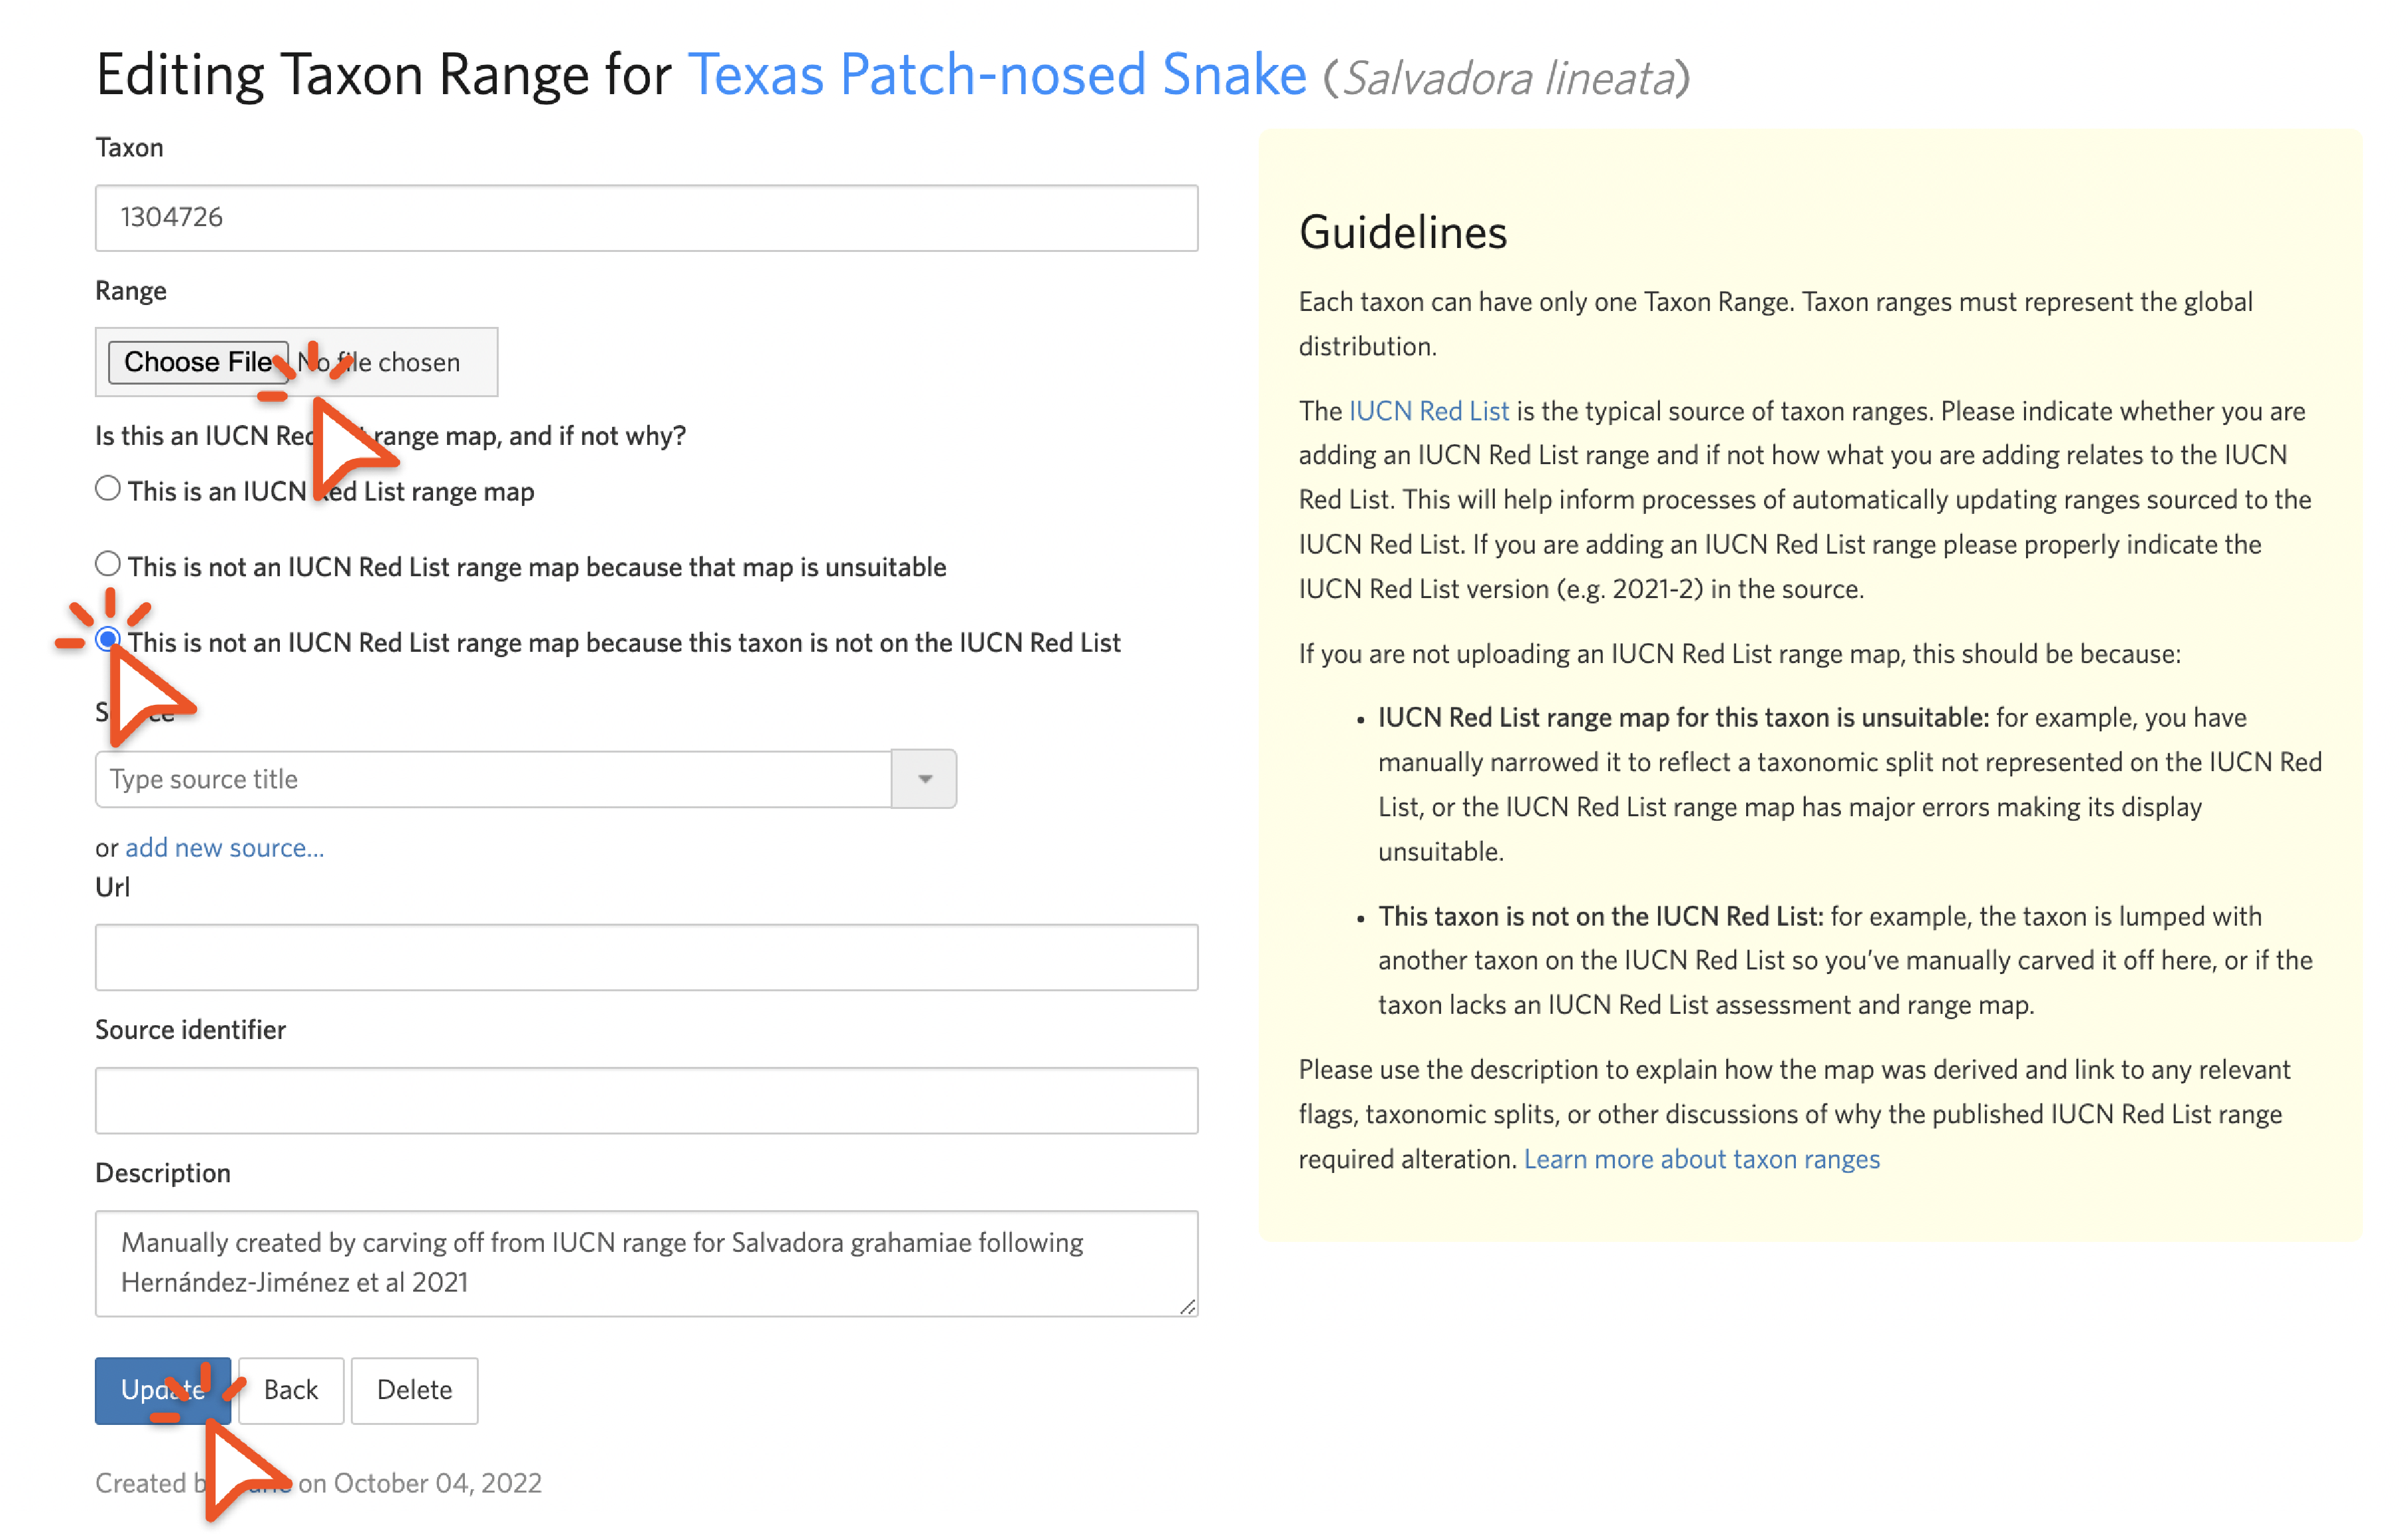
To create a new taxon range for a taxon that doesn’t have one, click “Add Taxon Range” from the lower right of the taxon edit page.

Choose the KML via the chooser, toggle to the “not in the IUCN Red List” choice, and describe how the range was derived.
While we realize that updating taxon ranges is time consuming and requires GIS software, we encourage you to do it as it helps make splits easier to understand if the output taxa have suitable taxon ranges, and it helps people construct atlases as described in Step 2.
Step 5: Check for deviations and active children
Because splits are time consuming to make, there are often temporary deviations in place before they are made. You can see this from “Relationship: Deviation” notices on the draft taxon split. You should also check the deviation to make sure the intent isn’t to deviate permanently.
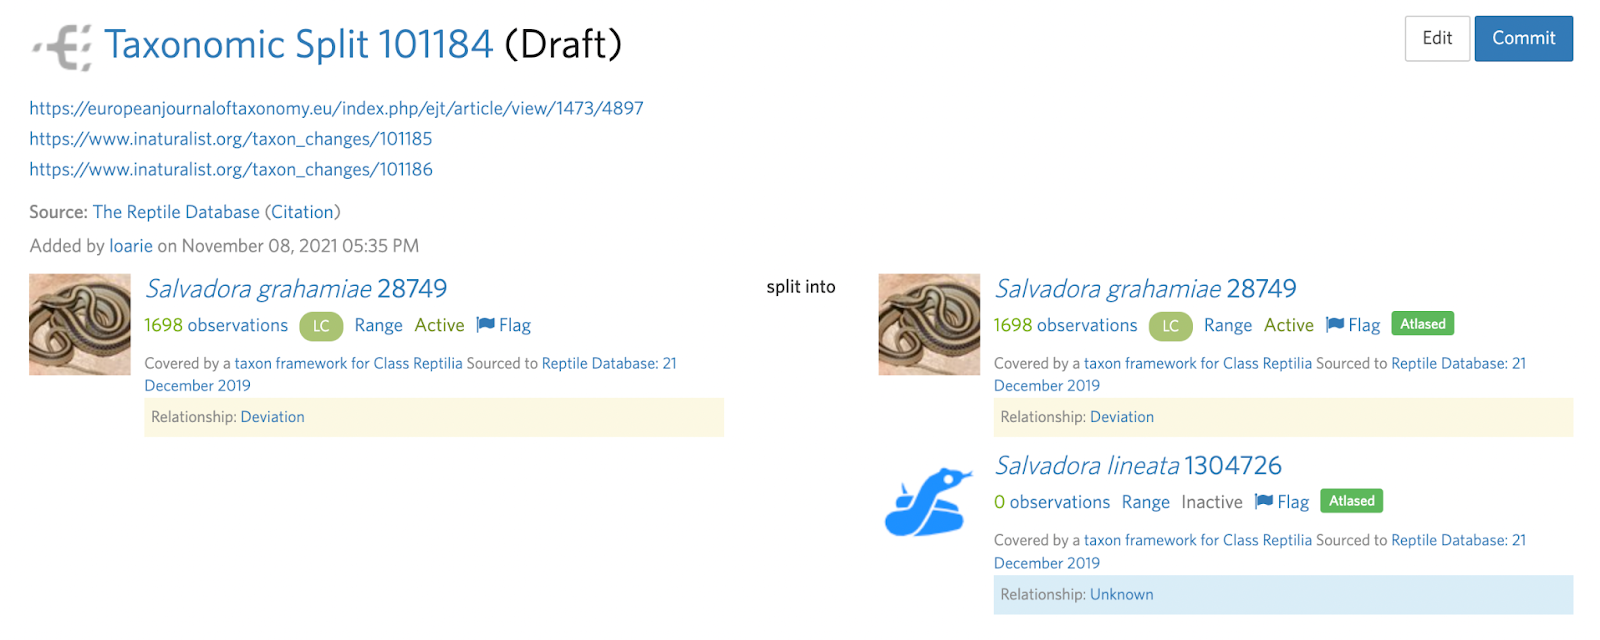
Splits also often require more than one taxon change which can sometimes be made clear in the deviation. For example, in this Salvadora example, a subspecies is being elevated to species status.
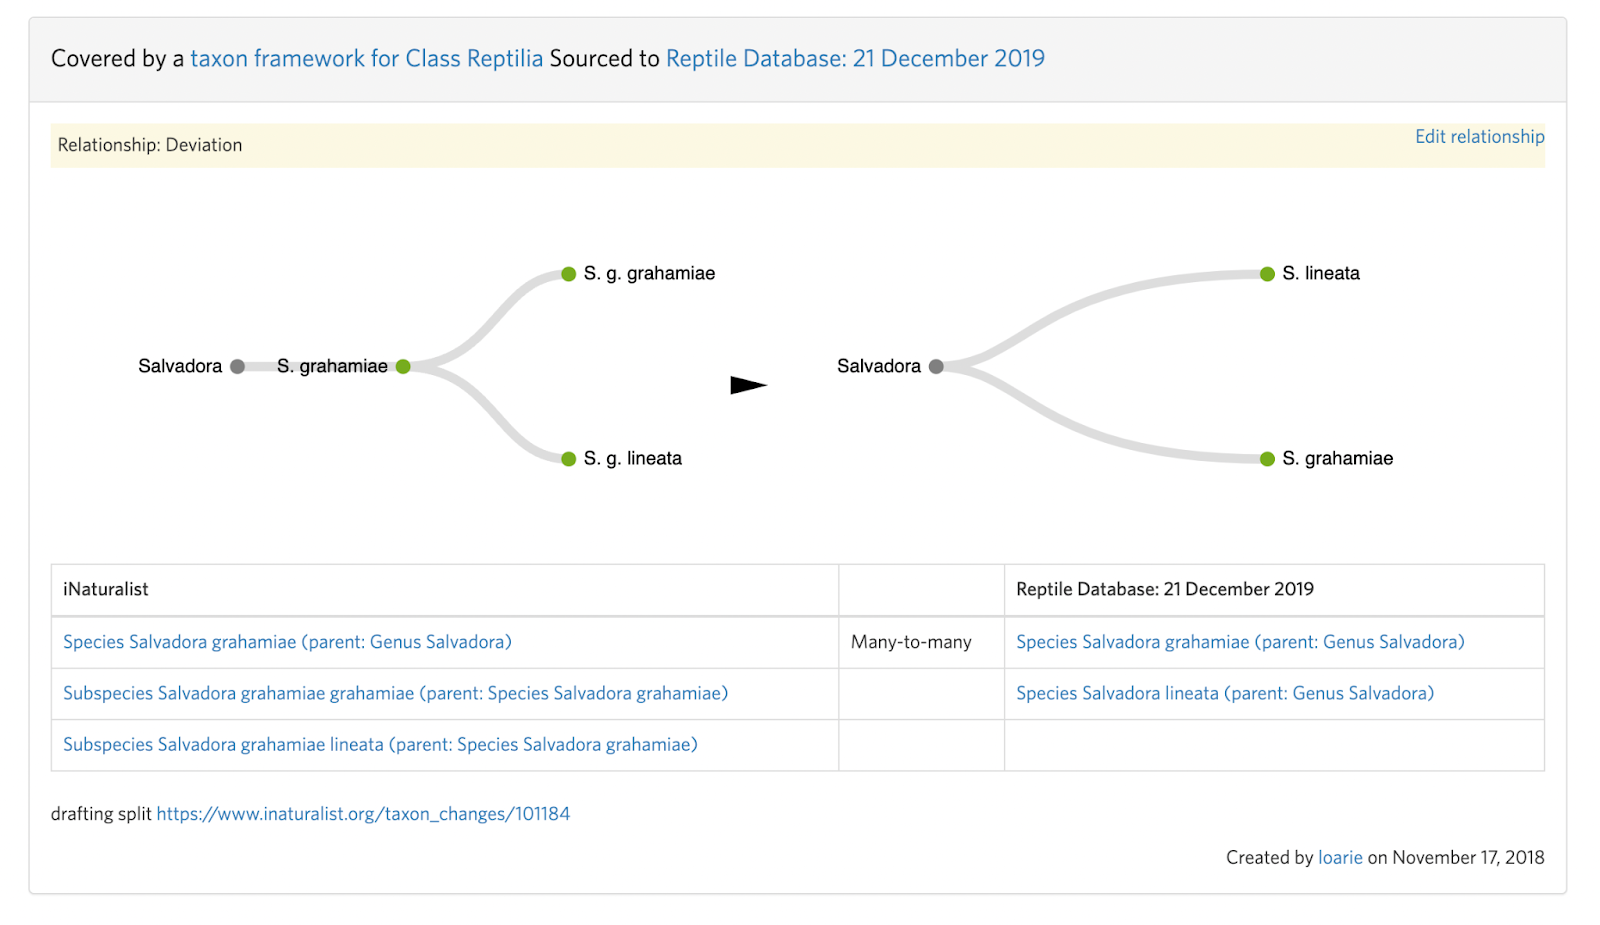
This means that the input taxon has two active children (subspecies) that must first be handled with two separate taxon swaps into the respective species (see B. Step 4):
Salvadora grahamiae ssp. grahamiae ---(swap)--> Salvadora grahamiae
Salvadora grahamiae ssp. lineata ---(swap)--> Salvadora lineata
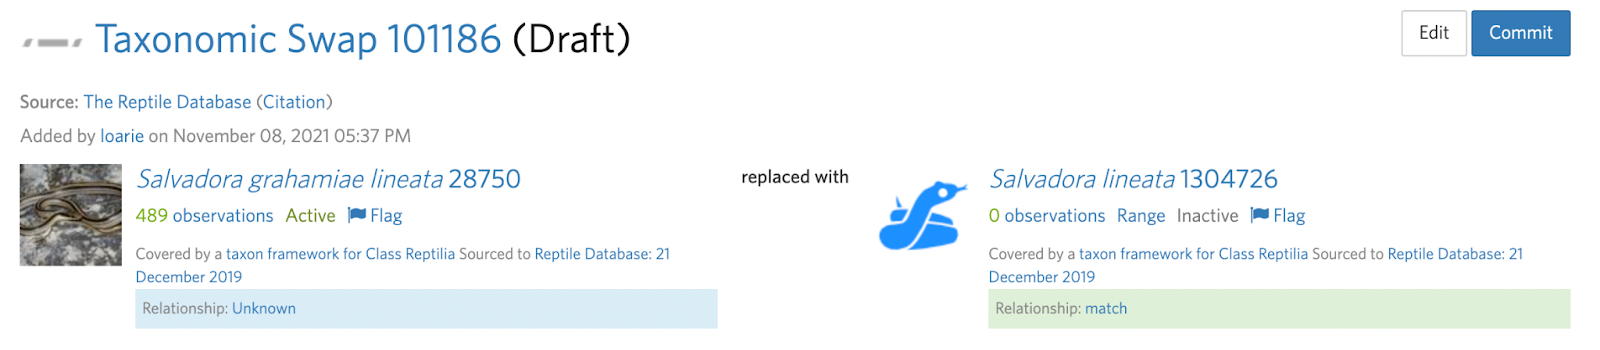
Before the split can be committed:
Salvadora grahamiae --(split)--> Salvadora grahamiae, Salvadora lineata
If your intention is to resolve a deviation, as part of committing the split make sure to remove the deviation and put the appropriate "match" taxon framework relationships in place.
Step 6: Committing the split
Before committing the split, run the Analyze IDs tool again to make sure you’re comfortable with destinations of the IDs that will result from the split. We recommend copying the Analyze ID output stats and, if there are IDs in the “Outside of all atlases” and “Overlapping atlases” categories, copy those links so that they can be used in Step 7 (the Analyze ID tool will not be available after the split is committed).

Step 7: Resolving the flag and encourage the community to ID coarsened observations
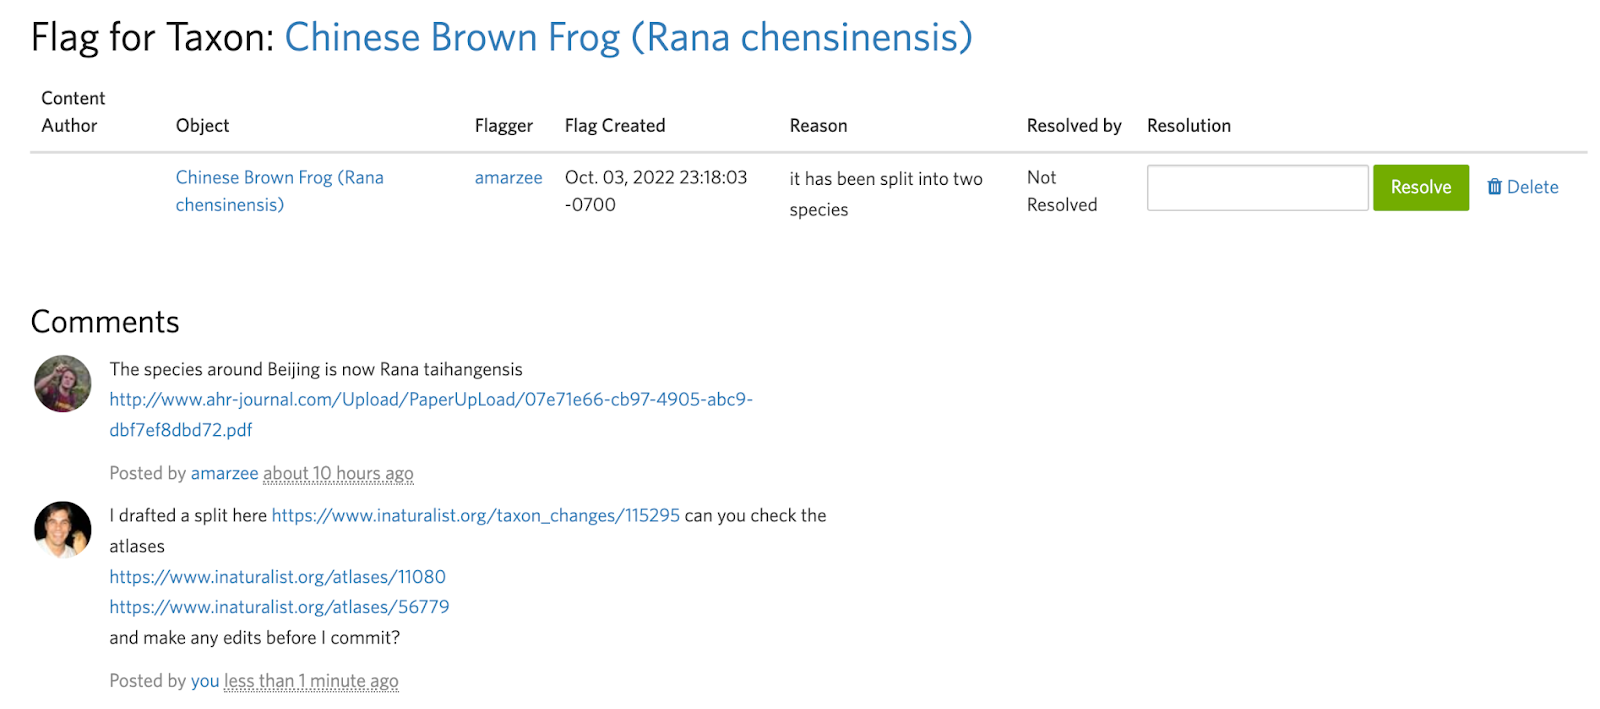
Once the split is committed, comment on and resolve the flag. We recommend pasting in the output from the Analyze IDs tool and the “overlapping atlases” and "outside of all atlases” links so that the community has a better sense of what the split did and which IDs were coarsened.

Tip 1: Large splits may take a while to process
Committing a taxon split requires replacing existing IDs of the input taxon with new IDs generated by the swap as well as determining the proper replacement ID taxon which can be time consuming.
For taxon splits with many tens of thousands of observations and IDs on the input taxon, these updates can take many hours to update. You can check the committed taxon split for the “Taxon change commit may still be processing…” notice to see whether the records have been updated. Keep in mind the order at which IDs/observations are updated isn’t predictable (e.g. not based on creation date).

Was this article helpful?
That’s Great!
Thank you for your feedback
Sorry! We couldn't be helpful
Thank you for your feedback
Feedback sent
We appreciate your effort and will try to fix the article